Wednesday, September 21, 2011
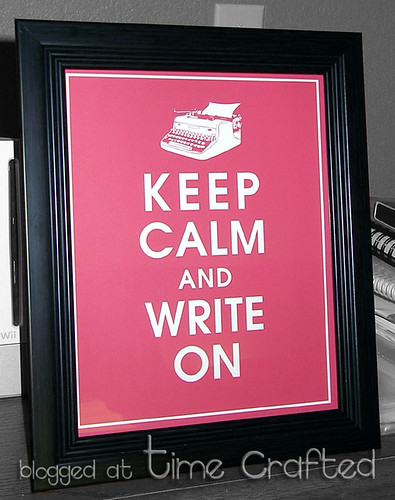
Keep Calm and Write On

Wednesday, July 6, 2011
My gift to her, her gift to me.
My girl was born with something that didn't come from me...the shopping gene. She loves it. Thankfully, shopping can be Target for trash bags or Costco for toilet paper and coffee or Whole Foods for her brother's gluten & casein free needs.But, sometimes, it is nice to treat your shopping buddy, the one who keeps you motivated through all those shopping trips to make sure your other kidlet doesn't feel like he's missing out when his foods are often different from the kids he goes to school with. She asks, is it organic? Is it gluten free? Does that have casein? Can my brother have it? Sometimes it's her turn.
When we left that morning, the marine layer was in and it was chilly out...hence the jeans & long sleeves in June.
We started at Michael's craft store with no purpose in mind other than a look-see. And would you believe it? We left with nothing. Not a thing!
As we left Border's, my feet turned right and marched over to Aaron Brother's.
Once inside, I headed for the Liquitex paint and as we approached the aisle, my girl tugged on my arm, "Mama, look!" She promptly asked me for what she had gasped at. I promptly said, "No."


Friday, December 17, 2010
Teacher's Gifts with Etsy Love {Sunbasilgarden}
Often, I hand make their gifts, but I knew that time would run short this year. Thankfully, when I saw Sunbasilgarden's uber cute hand crafted soaps, I knew I had a great solution!
Saturday, September 4, 2010
{Sew} Small, {Sew} Strong
Saturday, June 5, 2010
We interupt the regularly scheduled program.....for {Teacher Gifts}!
Yes, I know I promised to return with {Part Two}of the doll house with pictures of its completion and I'm sorry I haven't gotten that up yet. I was trapped in the kaleidoscope of the zany & zippy, Crazyland that is the last week of school! So, please pardon the interruption to the regularly scheduled program as I have some teachers, aides, and principal gifts to share! :>
We had two teachers, two aides, and one principal that we brought end of the year thanks and goodies too. While these were the people who we wrote, created and packaged bits for, we do know that it takes many more people to make a successful school year for our children and we are grateful to all that contributed!!
Initially, we were thinking Gerber Daisies, as I had the tag's wording in mind. But, when I went looking, I found these fabulous and fun plants! They are Celosias and the flower is spiky, feathery, vibrant, and look like little colorful Christmas trees, up close. They could not be more perfect! You can read more about Celosias here and here. I have uploaded two close-up shots of the flowers themselves on Flickr here and here.
The Celosias were four inch plants in the standard green plastic pot....perfect for planting, not so great for gift giving. So, wee girl and I made a quick trip to Jo-Ann's and bought some dark green burlap. We cut it into squares and Princess helped hold the burlap folded up around the pot, while I tied on some twine from the hardware store that I had. Tie on the tag and they are a sweet little gift!
Teachers definitely put in so much time and effort and these two teachers, in particular, we all appreciate so much. We wanted to give them a little something extra to show that. So, I wrapped up four cards (1, 2, 3, 4) and envelopes and tied them up in wide pink grosgrain ribbon for simple, yet sweet gift giving.
As we were giving out our end of the year gifts, a teacher surprised me with an extremely thoughtful gift. She took pictures of our son through his school day, with his friends, classmates, different aides & teachers, in the classroom, at lunch, and recess. She said that she knew that I scrapbook and wanted to give me pictures to scrap. How thoughtful is that?!?!?!!
We have worked with this teacher closely for the last two years and I do not have words to express how wonderful she has been. I am sure that when any of us look back, twenty years from now, we will remember her very well and still be grateful for her.
Wednesday, January 27, 2010
Come! Meet Primrose!!
Primrose, a most adorable bunny makes my daughter smile too! Now, I'm not a knitter, but as someone who appreciates handmade and creating in general, of course I wanted to know more and I thought some of you might too. :>
Mom bought the pattern to knit Primrose from Mary Jane's Tearoom over at etsy. I asked Mom what she thought about the quality of the pattern and she said that, "Her directions are meticulous! Excellent!" I thought that was high commendation since I often hear her grumbling about errors in knitting patterns. Apparently, Primrose was a delight to knit!
Can you believe how cute this bunny is??!! And even cuter, her sweet little sweater, shorts, tights, and shoes??!! I can't stand it......too too CUTE!!!
And even a fluffy bunny tail for sweet Primrose. There is even a hole in her shorts, just for that sweet fluff!Susan, the creator of these knitted treasures at Mary Jane's Tearoom, also has a BLOG, where her most recent post lets us know that Susan is donating 80% of her proceeds from her Primrose sales to Help for Haiti through the campaign at the popular knitting and crocheting site, Ravelry, through the month of January.
And soon enough....when Mom finishes it for my boy, we'll have Oscar (another one of Susan's patterns that Mom bought) to meet! His clothes are finished, but he is still in need of his bunny body. Thought you just might like a peek! :>Do you have a crafty family? Or are you their creative spark?
Tuesday, December 29, 2009
Tim Holtz Tag & Christmas Teacher Gifts
Rocky Candy, how I love you....let me count the ways..... Well, if I truly did count.....this post would go on and on and on and on and on and on and ON! {And since I'm already a chatty gal, I'd rather just leave room on the post for that chatter!} But, needless to say, I LOVE the stuff, both the Stickles and Distress Crackle Paint alike...thank you Tim Holtz!Here are some of my tags that I made based on his first inspirational tag from Tim's 12 Tags of Christmas:
I made five total. These three went on top of the blank Stampin' Up! tags I made for my son's teachers' Christmas presents this year. Next, I inked them up with black ink and embossed them twice with clear embossing powder. I inked up the snowflake stamp with Versamark and then pressed it down into the embossed snowman while the embossing powder was still warm. When it cooled down, I removed the stamp and it left a snowflake depression in my snowman (Thank you Claire for showing me that technique! :>). And then I added the white paint, followed the rest of Tim's instructions, and I had SO MUCH FANTASTIC FUN!!!! I felt like an inky, sticky kidlet making these and I think I had a permenant Chesire smile etched into my face! :>

Using assorted Stampin' Up! tag stamps, I made fifty-four tags, eighteen for each teacher. I used my Spica glitter pens to add some sparkle, some crystal Stickles for snow, and threaded each one with coordinating embroidery thread.
To present them, I threaded through each set of tags with a double strand of silver cord, put a signed large Tim snowman tag on top, and tied them off. School let out a week before Christmas this year, so these were practical for the teachers to use on their gifts. Practical, crafty, and fun makes for a great gift in my book and hopefully, in their books as well. These three women have been wonderful assets in our son's life and we are thankful for all of them!Supplies:
Cardstock: White - Georgia Pacific; Certainly Celery - Stampin' Up!; Pure Poppy - Papertrey Ink; turquoise & blue - Stash
Ink: Tempting Turquoise, Real Red, Certainly Celery, Brocade Blue - Stampin' Up!; black - India Ink; Faded Jeans, Broken China, Worn Lipstick, Weathered Wood - Tim Holtz Distress Inks for Ranger
Stamps - Stampin' Up! (all except snowflake....$ stamp from stash)
Other: silver ribbon - Papertrey Ink; Grunge Paper & Board, Stickles, Distress Crackle Paint, Spica glitter pens - Copic; Paint Dabber - Adirondack; Versamark ink; clear embossing powder, embroidery floss & fibers - Stash
Tuesday, June 2, 2009
Another Teacher Thank You
We had another teacher to thank, Ms.Vicky, who was just simply wonderful to work with this year! She is kind, thoughtful, and really had our son's best interest at heart. I do not think I could say enough nice things about her. Just like with Ms. Connors, we really lucked out!For Ms. Vicky, I decided to make her Lauren's Captured Card Case and fill it with.....cards! This was the first time I used this template and I was delighted to find that it is Beyond Easy!! I made this in the wee hours of the morning, one night before school was out and even with lacking sleep, it was still super easy. I filled it with this, this, this, and this card. Initially, I was going to make a cute matching set, but as a lot of you know how fast the last couple weeks of school can fly by, I ran out of time. I didn't want to short change this fabulous teacher though and still wanted to give her handmade cards, so I just pulled from some that I already made.
K&Company's Brenda Walton Mira Specialty Paper Pad has the most fabulous papers I think I've seen in a paper pad! I had sworn off paper pads/stacks/slabs since I so often forget to use them and while they can bring the price of patterned paper Way down, if I'm not using them, then its not only a waste of money, but of storage space as well. However, this pad has tickled me so much that I'm running out of the first one I bought several months ago and actually went out and bought a second one recently!! The patterned paper with the bird came from a piece in that pack. I cut it down and then to add just a little bit of interest, I used the burnished glitter technique from Spike, which I learned from my friend Dana at Paperdaydream (you should see the Gorgeous butterfly with dry embossing she put on her blog yesterday!). I burnished glitter on the birdy's eye and her branch, both with Martha Stewart glitter.
I hope everyone is having a fantastic day so far! The sun has amazingly decided to come out and play today.......it didn't shine through the overcast sky until after 5pm yesterday. Would you believe that?! On June 1st?! It was a surprise, but the kidlets and I had a really fun day yesterday and as I listen to them play with a tub full of cars and airplanes, making every sound effect possible, I'm hoping for another great one! Just wanted to wish you one as well and thank all who craft some time to for a little blog surfing, a little creativity, and a little play! I know I will! :>
Supplies:
Cardstock: Kraft, Dark Chocolate, New Leaf - PTI
Patterned Paper: Brena Walton Mira Specialty Paper Pad - K&Co.
Glitter: Aquamarine Crystal, Brownstone - Martha Stewart
Template: Captured Card Case - PTI
Sunday, May 31, 2009
Thank You Teachers!!
School finished up the '08-'09 year on Friday. We were crazy fortunate that our son had the most Fabulous teacher this last year. Not only is she an outstanding teacher, but she was also the perfect fit for our boy! He grew and thrived in her classroom and we will certainly miss seeing her daily next school year!
Confession time! Like many of us, I am addicted to dollar departments. Every time I enter Target or Michael's, the gravitational pull toward the Dollar Spot or that lovely dollar aisle seems to be unbreakable. My daughter will ask, "Mama, where you driving?" (aka where am I pushing her in the shopping cart to?!).......um...to-the-land-of-cute-craftable-good-deals...can't stop now!!! And even worse, those fabulous one dollar craftables go into the ever growing collection at home and just wait and wait and wait and wait.....and wait to be used!!
But, this time, when I bought this adorable mini watering can, I knew exactly what I would be using it for.......a perfect little pencil holder for our perfect teacher! I wrapped a piece of Pure Poppy stitched grosgrain ribbon around the neck, adhering the whole piece with my ATG. I then made a bow, threaded two buttons with SU's hemp twine, and tied the whole thing together, knotting it in front of the top button. I adhered the bow embellishment to the Pure Poppy ribbon at the neck of the watering can with Fabri-Tac. This is a fabulous adhesive, especially for bulky tied ribbons and is a perfect item to coupon at Michael's! 
When it came time to adhere the mini chalkboard, I used a new glue...well, new to me, that is...Zip Dry Paper Glue. Laying down a line of the glue onto the watering can, using the button as a centering line, I placed the chalkboard on top of the glue. It wiggled quite a bit, so I just held it tight for about five minutes and then it held and didn't budge! The most difficult part of this little project was writing with chalk on the mini chalkboard. Thankfully, I was able to erase and start over....many, many times! I finally realized that my handwriting did not need to be perfect, but rather, it was most important that it was legible and that I got all of the letters into that space!
When I made Mom's Mother's Day gift, I did not realize that I would become hooked on Lauren Meader's Timeless Templates. Yes, I should have known better!! Again diving into my tubs of delightful craftables, I came up with two little pails that I got at Target Dollar spot, two for $1. I checked out all of Lauren's templates and their measurements and discovered that the one that would fit more than one of the pails is one of the templates that I already have...yay! After trying to print "From the Desk of" and arguing with my printer that was not taking the cardstock (it took it the last time, so I think it has multiple personalities!), I printed the templates out on regular printer paper and just layered it on top of the cardstock to cut and score. And do you know what?! I like making the template better that way!! I didn't think I would, but I do and have the added bonus that the score lines are not printed on my project, distracting the eye!

What was even more delightful than these cute little craftables was that this became a major use my stash project! The patterned paper came out of an old Die Cuts With A View Fall stack and was inked with some Distress Ink. I made a ribbon flower by twisting and folding one piece of ribbon at each petal (kind of like how a cause ribbon is folded - pink for Breast Cancer, red for Aids or Heart Disease, etc.) and adhering each layer of ribbon with Fabri-Tac. The layered buttons were tied off with more hemp twine and then instead of tying them on to the flower, which would have changed its shape, I used more Fabri-Tac to adhere the buttons to the top of the flower.

I filled the mini pails with colorful paper clips & binder clips that were in my office supplies. And into the mini watering can went our perfect teacher's favorite brand of pencils, Ticonderoga. It took forty-eight pencils, I think. I wanted a little extra something that she could use at home as I suspected she would keep the other items in the classroom, so I included seed packets for zucchini, french leeks, and carrots for her garden. I thought they still tied in with the gift because of the cute watering can!
Lastly, I would really like to thank all the wonderful teachers that teach our children, guide them through their learning adventures, and help them thrive! I would like to thank all the parents who get involved in their kidlets' education. And I also want to thank everyone who supports the schools in their communities, whether or not you have kidlets attending. Without such strong community support in our town, my son and his classmates would not have experienced music class, art class, square dancing, spirit days, movie nights, star gazing night, and all the other wonderfully enriching activities that are paid for and put on by the PTO. Our community support is also what provides lots of our technical equipment, field trips, and other educational materials that would not be possible for our little school to have. So, thank you again to all who support their community schools and help provide the education and enrichment that is necessary for all of our kidlets to thrive and hopefully return that generosity for the next generation!!
Supplies:
Cardstock: Pure Poppy - PTI
Ink: Weathered Wood - Distress Ink by Ranger
Patterned Paper: Fall Stack - DCWV
Ribbon: Pure Poppy Stitched 5/8" Grosgrain - PTI; Natural Hemp Twine - SU!
Buttons: Stash....if I had to guess, I would guess either SEI and/or Autumn Leaves
Other: Mini Chalkboard - Darice
Monday, May 18, 2009
From the Desk of.....

So, to travel back in time (don't worry we won't go far, just back a week), I've got the 'packaging' for Mom's Mother's Day present to share. Admiring Lauren Meader's Timeless Templates since they came out, I'm embarrassed to admit that I did not try one until now (I mean then, last week.....well, if we've time traveled, I mean now...'cause its last week, right? Yes, the men in white coats have me on their checklist!).
Using her From the Desk of template, I made a super duper easy little piece that will go perfectly in Mom's kitchen. Lauren provides a template to cut out a decorative layer, but I also wanted to mat that. To go about doing that, I cut the Berry Sorbet cardstock just outside the lines and the patterned paper just inside the lines and it worked out quite well, not perfect, but I'm still happy. I did however, have issues with the half circle in the front. For some reason, I seem to remember Lauren saying she used a coluzzle to cut it out evenly, but mine did not line up....at all. Consequently, I cut it by hand.
Do you remember me saying I CANNOT cut out circles freehand?! (Remember, I'm not cutting on the line, I'm cutting inside and outside the line to make an extra mat.) So, that's a skill I'll have to work on (or find another tool to cut it for me!!).
And speaking of improvement......when I printed the templates out, I did not see how to lighten the lines up, so the score line would not show so much. But, Lauren, ever So Great at answering any questions in her comments, shot me an email that reminded me of the option of printing on printer paper and lining it up with the cardstock as a guide or clicking 'grayscale' in my printing options. I will deifnitely be trying that next time.
I added some pretty pre-patterned & glittered K&Company chipboard letters to the front (I wanted to spell 'Mom', but the font I had was too chunky for the patterened paper, so Linda, it was!). Some of the letters in the assortment have pearls on them and some do not. Of the letters I pulled, only the 'A' had a pearl and it was looking rather lonely, so I added one to the 'L' and another to the 'N' to complete my little project.
Are you wondering what I put inside of this? The goodies that went inside of it (no, I do not have a photo of it....sorry) do not really go with the box itself. Mom's working on her house, so I knew I wanted to get a Home Depot gift card. Except, I am Really not a fan of Giving gift cards (receiving them though....well, that's a whole other Delightful story!! :>). I prefer to pick out a gift that I think someone will Love. But, I knew a Home Depot card she would be able to use and if she just did not want to use it for any of her home improvement projects, she could use it to buy a pretty plant (she loves gardening). With the gift card, were a pack of vinyl (latex free) gloves, two cord clips (to tie up all those computer cords), blue painter's tape (she just bought about a dozen gallons of paint), a scraper with extra blades, and a six pack of mini Crazy glue tubes. Again, yes, I know its an odd gift to put into the desk set, but it worked. And the first thing she thought to use her new container for (and no, it was not one of my dozen or so suggestions) were her post-its! She has a serious addiciton to Post-It notes, ball point pens, and knitting needles....any twelve step program I can sign her up for? No? Well, then I guess a desk set to hold two of the three will have to do!


Cardstock: Ocean Tides, Berry Sorbet - PTI
Patterned Paper: K&Company
Template: From the Desk of - PTI
Embellishments: Chipboard Letters - K&Company, K-Ology Hannah Alphabet; White Pearls - KAISERcraft
Saturday, May 9, 2009
Happy Mother's Day!
So, instead, I thought I would post one of my favorite cards I've ever made and it just so happens that it was Mom's Mother's Day card two years ago.....thought that made it kind of appropriate!
Masking tape, chalk inks, some Modge Podge, and a great stamp make for fabulous fun! I learned this technique from Ethel, while on 2Peas, two years ago. All you do is tear masking tape (I chose strips, but you can tear it into any shape), arrange it on your piece of cardstock to your liking, burnish it Really well with a bone folder (otherwise you will not get a good impression when you stamp if its too bumpy), randomly ink the masking taped cardstock with your choice of chalk ink pads (direct to paper), and then seal with a light coat of Modge Podge. When it is completely dry, stamp on top with StazOn ink. This technique looks really great with collage stamping. Since I am not the most adept at that, I chose one beautiful PSX tulip botanical. I made four of these cards at the same time as I applied my masking tape to an entire sheet (8 1/2 x 11") cardstock and even though they were made at the same time using the same process and stamp, they all look so different because of the random inking. This one has a lot more of the purples, but two of the others were quite a bit more pink. I really loved them all and want to do the same (or similar) thing again and frame it. Wouldn't that make a great gift?!
Wednesday, April 29, 2009
Knitted Sweets & A Hippity Hop!

Two sweet delights were waiting in my daughter's Easter basket from my Mom, her Grammie. Mom was excited to find a great way to use the smaller left over amounts of yarn from other various projects. And I am just tickled that the pink beads and two blingy buttons on the cupcakes are from my grandmother's collection. So now, I am watching my daughter have tea parties with her princesses using cupcakes made by her Grammie with treasures from her Great Grandma on them. It just warms my heart. The bears were not from my Grandma's collection, but are vintage. Aren't these just so sweet?!
Mom wanted to make sure that her grandson had something fun too. Knowing that he loves bunnies right now, she knitted one for him! She said the knitting was simply a square that is folded and tucked a bunch of different ways. Since I don't knit, it looked pretty amazing to me! :> Thank you for your hand crafted goodness! :>